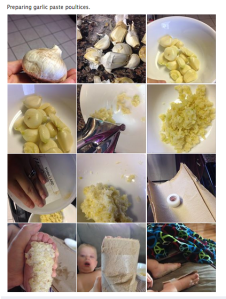
Step by Step Garlic Paste Poultice
We are big fans of Garlic in our family. We cook with it. Supplement with it. And use it medicinally. Garlic is one of the most incredibly potent antibiotics nature makes and also has components in it that boost the immune system in multiple ways. Once a fresh clove of garlic is crushed elements intermingle and create something called allicin. Allicin exhibits incredibly powerful anti bacterial and anti fungal effects. The nutritional industry has figured out ways to stabilize what is, in nature a fragile and limited time availability compound. Once a garlic clove is crushed the clock starts ticking. You only have a guaranteed 15 minutes from the time allicin is activated till the time it begins to fade. Some experts claim it lasts as long as 40 minutes. Immune boosting products that contain stabilized allicin are really fantastic and are an ideal way to get those benefits with no work and no smelly breath involved.
Supplements can be expensive. Especially for a large family on a tight budget. They also require the ability to swallow pills and are typically dosed for adults, not children. For children, finding a way to get affordable allicin rich garlic compounds into them involves poultices. A while back I did a video tutorial on how to make a garlic poultice. This is the method we used in our family for several years and it works incredibly well. However, it is also wet and a bit on the messy side. This year a friend introduced me to the concept of Garlic Paste. We experimented with it and discovered that for our kids this is a more efficient and effective way of doing garlic poultices. So, without further ado, here is my DIY instructions on how to make:
Garlic Paste Poultice
The quantities in this tutorial should be enough for 2 to 3 pairs of child sized feet or 1 pair of large adult sized feet.
Start with a full head of fresh, raw, organic garlic. Why organic? The point of this is that it is going to be absorbed into the body and blood stream at a rapid rate. Any residual fungicides, pesticides and chemicals that are left on commercially raised garlic will be absorbed along with all the good properties. If it’s a choice between regular ol’ cheapest thing the local store has fresh garlic and none at all, by all means use what you can get. But, ideally, my recommendation will always be organic for this purpose.
Pre-minced garlic purchased at the store in glass containers, even that from the refrigerator section will not work for this purpose. Pre-peeled cloves will also not work nearly as well. Stick with the real deal still safely ensconced in it’s feathery papery layers.
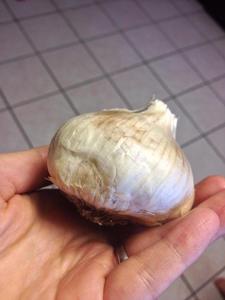
Head of Raw Garlic
Loosen all the outer dried layers off of it enough so that you can divide the individual cloves out. Once the cloves are separated lay on a firm surface (I use our granite counter top or a large wooden cutting board) take something solid like the flat bottom of a glass or bottom of a mortar and do a quick “whap” on each of the cloves. The purpose isn’t to crush them but to pop loose the dried individual outer peel enough so that they are easily removed.
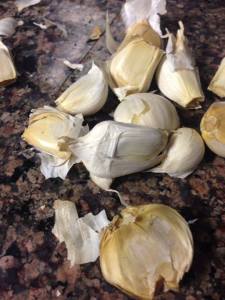
Whapped garlic cloves Prior to Peeling
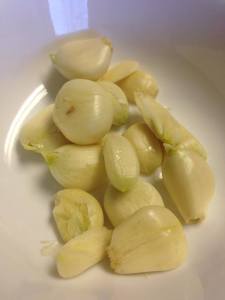
Once the cloves are peeled they are ready for the next stage!
This next stage you have a variety of options. I personally prefer using a tool we purchased a while back for this purpose. A high quality garlic press. Ours has been going strong for years. If you don’t own a garlic press you can crush the garlic with a fork and finish off the mincing with a knife. It can also be pummeled into small bits in a mortar and pestle.
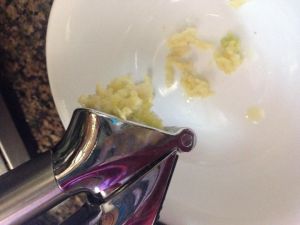
Mincing the Garlic via a Press
This is what a head of garlic looks like after it’s minced. One of the advantages of mincing is that it goes fast and thoroughly mixes all the different parts of each clove together ensuring optimal allicin creation.
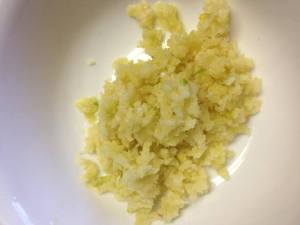
Head of Minced Garlic
This is where the instructions differ from the water and heat based poultices we did before. Although some properties are drawn out faster and more effectively with the hot water it can be somewhat tricky to make sure the water isn’t too hot. Making it into a paste means that the active properties will be drawn out at a slower rate via the warmth of the skin.
A crucial component of the paste is the base the minced garlic is mixed with. Something too thin will not allow you to maintain that all important “paste like” spreadable consistency. It will also not adequately buffer or protect the skin from the burning elements of the garlic. Part of what makes the paste preferred by us is that it can be worn longer periods of time with reduced chances of irritation and burning over the water poultice method.
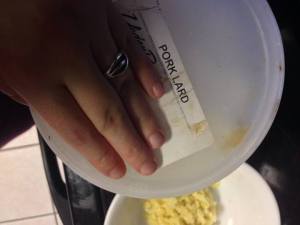
The original tutorial I read about this recommended using petroleum jelly. Petroleum jelly is a no-no in our house mostly because…well, it’s derived from petroleum. So, it was important to me to find an acceptable substitute. Coconut oil is too thin and melts too rapidly in contact with warmth. Same with olive or almond or any of my normal go-to carrier oils. The first couple of batches I used Beeyoutiful’s Body Butter. It worked incredibly well and was the perfect consistency. It’s also rather an expensive base. With a second sickness hitting our house I needed something that would be affordable to use multiple times per day. As I stood in front of our open refrigerator wracking my brain for what I could use it occurred to me. Lard! That lovely tub of white lard. Not the best smelling but relatively cheap, natural and safe.
Ideally you want to use at least 50% ratio of base carrier to minced garlic. For very small children, infants or individuals with extra sensitive skin the ratio can be increased to 2 parts Lard (or carrier base of your choice) to 1 part minced garlic. Once the base and garlic are mixed together it should be a thick, spreadable concoction.
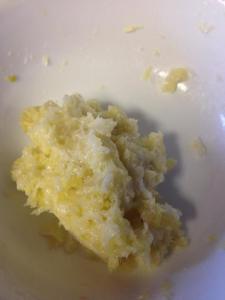
The Mixed Garlic Paste
Although technically this paste could be used on any part of the body my preferred spot is the feet. The skin is thicker and more protected from burning there while at the same time having a very high concentration of receptors that handles the uptake of the best properties of the garlic extremely well. Make sure the footsies are clean and dry and then slather the paste on. It’s Ok to be generous!
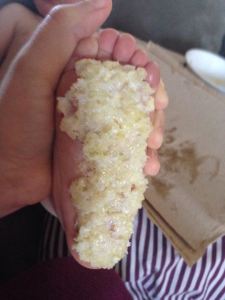
Garlic Paste spread on the foot
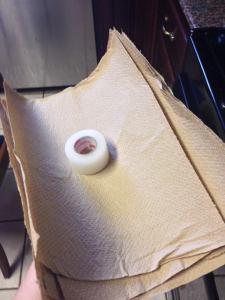
To top the paste off you can use water proof bandages which are my preference because they are nice and tidy with minimal risk of mess leaking out as the oil warms. Ran out of those before writing up this tutorial though so used my fall-back. Folded paper towels. You want the paper towel to be folded in enough layers to keep the oil from leaking out all over everything as the mixture warms against the feet. I use medical tape to secure it in place.
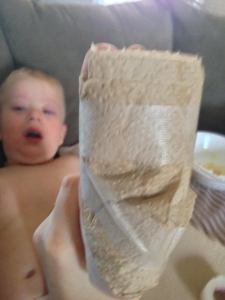 The finished product on my 2 yo Cmans footsies. For the record, he isn’t crying because of the foot paste, he was on his third hour of crying in misery from the on-set of a virus with full body malaise. He felt much improved after the garlic paste treatment and ran around happily for a couple of hours despite still having a low-grade fever!
Some cautionary safety notes:
Please understand that raw garlic potency and “burn factor” can vary a lot from one batch, one harvest, one head and one variety to another. There is no way to know for sure how “hot” a particular batch of paste is going to be. For this reason please DO NOT leave on feet all night as some tutorials recommend. Far too many individuals have been burned this way. Especially do not leave on the feet of children. Check frequently to make sure no initial redness or irritation is starting. My policy is to check every 10 minutes with the paste on our children and more frequently if they start whining or complaining about it. Garlic is powerful. It has literally burned holes into peoples feet. As with all things anything that has properties to be incredibly potent also has the potential to cause harm if not used with common sense, precaution and wisdom.
Sometimes it can be hard to tell if it’s “done” or if it’s been left on long enough to do a good job. A rule of thumb that has served us well is to leave it on until you can smell garlic on the breath of the individual receiving the poultice. It’s a sure sign that adequate levels of garlic have been absorbed into the blood stream to do an effective job against whatever you need it to do. As soon as we smell the garlic breath we remove the poultice immediately. And prior to that if any irritation of the feet happens.
Let me know if you try this! Happy and safe poulticing and to all a goodnight!


