Lately I have been experimenting with what range of things soaked flour doughs can be used with. I cannot even express my delight in discovering that soaked flour actually makes cinnamon rolls of a far superior texture to anything else I have been able to create with regular un-soaked whole wheat flour. A couple of days ago I experimented with a batch of cinnamon rolls and they turned out to be what myself and all my ever helpful tasters called the best cinnamon rolls ever. Sorry Cinnabon, I think I just might have nudged you over in the tastiest, most tender, moist and all around incredible sweet flavor sensation ever.
I used a modified version of the soaked flour recipe that was published in the 2010 Beeyoutiful Catalog as the base for the dough.
Soaked Cinnamon Roll Dough
4 cups freshly ground hard white winter wheat (I use Prairie Gold)
1 1/4 cups buttermilk (homemade or storebought, just make sure the store bought has live cultures/bacteria in it)
3/4 cup extra virgin coconut oil, melted
¼ cup warm water
1 Tablespoon dry instant yeast
2 Tablespoons Sorghum (Blackstrap Molasses, or honey could be used)
1 tsp. Salt
½ tsp. Baking soda
1 (may need a bit more or less) cup unbleached organic white flour
Toppings!
1 to 2 sticks of butter (softened to room temp, spreadable texture)
1/4 to 1/2 cup organic extra virgin coconut oil (also softened)
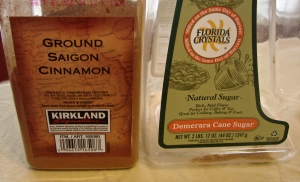
Cinnamon and yet more Cinnamon
Rapadura, Cane Sugar or anything that you can justify as being healthier than white sugar (Shhh…Don’t tell anybody but white sugar works just fine if you really don’t care to maintain the facade of healthy with this creation.)
Raw Honey
Optional: Chopped Nuts and Trader Joe’s Spicy Chai Powder Mix
Directions for Assembly:
Warm butter-milk and coconut oil and mix in with Whole Wheat flour. Save the white flour for later.
Dough should not be super sticky but since this is for cinnamon rolls and not loaf bread it’s Ok if the texture is slightly more sticky than the perfect texture would be for loaf bread. Form a ball and place in the bowl, cover with cheesecloth and leave in a warm place overnight (12-24 hours).
In the morning, combine water, Sorghum, salt and baking soda in a measuring cup and mix well. Add instant yeast and cup of white flour directly to the dough and pour wet ingredients over top. Mix until it is smooth and the “elastic bands” as some call it are visible as the gluten activates. Form a nice ball and again place your dough back into the bowl and cover with cheesecloth. Allow it to rise until it had doubled in size. Pummel dough down, knead it for just about a minute. Lightly sprinkle your “rolling” area with white flour, use a bit more if the dough is still a bit sticky to make sure it doesn’t superglue itself to the surface. It is a lot easier to manage if the dough is divided into two parts but the ambitious among us (with amazon muscle arms) and plenty of space can certainly tackle it all at once.
Now comes the workout part. Roll roll and roll some more. When your arms feel like they are going to fall off, remind yourself that this is a good time to take out any pent up frustrations out on something that needs it. Whack it a couple of times and roll some more. Once it is all rolled out nice and thin (not pie crust thin but just barely thicker. Keep in mind this will puff up considerably in size and the flavor is better the less dough/bread there is and the more toppings so don’t be afraid of thin!)
This is my favorite part. Slap dab and smear the butter and coconut oil all over your huge spread of dough. I personally recommend hands for this because it is a lot more fun but that is just me. Those with texture issues that prefer not to get their hand conditioning treatments via cooking projects involving cocont oil and butter are more than welcome to use utensils. Once a generous (and I do mean generous here people, don’t scrimp, don’t save, don’t count calories or measure the waistline, this is the time to be liberal!) layer of fatty goodness has been successfully applied you can move onto the sprinkle and plop phase.
I tried an additional new twist to this last batch of cinnamon rolls by sprinkling Trader Joe’s Chai Latte powder over the butter/oil blend.
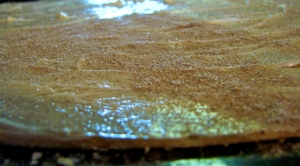
I really liked the extra flavor!! It is totally optional though. Follow the Chai Sprinkling with a hefty dose of cinnamon. If you skip the Chai powder add yet more Cinnamon. One of the biggest flaw’s that I have seen in homemade cinnamon rolls is a fear of getting nice and heavy handed with the cinnamon sprinkling. Don’t fear the cinnamon! This is the one part of this recipe that is totally good for you in every respect.
Follow the cinnamon up with Rapadura (or that white stuff that we aren’t going to officially endorse here).
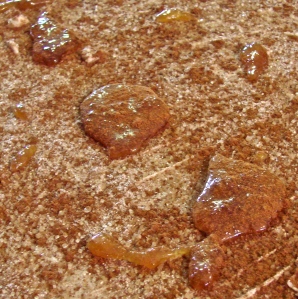
Last but not least Dollup raw honey in random blobs over everything. If you used unsalted butter now is a good time to sprinkle a dash of sea salt over everything.
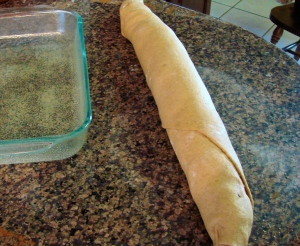
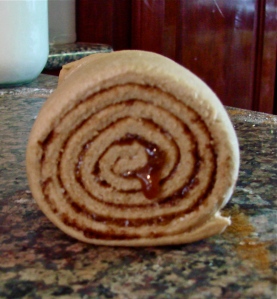
Now is the time to roll everything up into one big log of dough. Here is something else that is easy to have go wrong. Make sure you keep even “tension” as you roll and don’t allow loose or floppy areas to get rolled up. It’ll mess with the perfectly round rolls that are of course the end goal and will look funny as it rises.
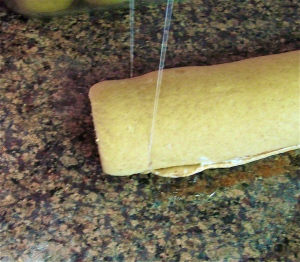
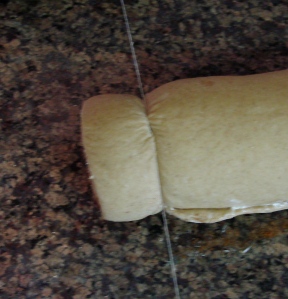
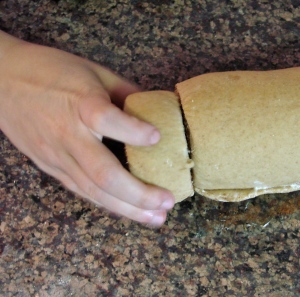
Once it is all rolled up a long piece of unflavored floss or double up a piece of heavy duty, good quality sewing thread. We only ever have mint flavored floss around here so I end up using sewing thread more often than not. (Word of experience, don’t use the mint thinking it won’t matter. It does matter. A lot.) The reason for using this method of cutting out the rolls is that it protects that lovely roundness and prevents the jagged and mushed look that you can get if you try to use a knife.
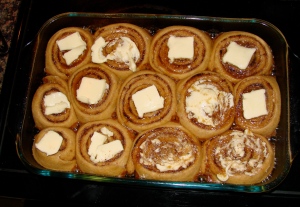
Plop in a pre-greased baking dish of your preference. I use Pyrex usually because it’s easy to clean, has sides to keep the wondrous baked goo from spreading all over the place, and has the best visibility for my compulsive “checking” Here is a bit of a trick I figured out a while back. I dislike “crunch” with my cinnamon rolls and ended up part of the time with “crunchy” tops by the time the rest of it was done. Now I spread some softened butter over the tops of my rolls before I slide them into the oven and the butter keeps the tops nice and soft while the middles are baking.
Allow to rise to roughly double and slide into the oven to bake for roughly 30 minutes at 350.
I don’t have the photo’s of the finished product on my computer yet. Will edit that in later. The texture of these rolls are incredible due to it being soaked flour. Delicate, tender and moist. No hint of the course chewiness so often associated with whole wheat. This does have a bit of white flour in it as well. DELICIOUS and DELECTABLE sums it up beautifully.


Sounds good Steph. Can’t wait to try them. However, they are missing a key ingredient…the cream cheese whipped with honey to cover the top! 🙂
Toppings for these delectable goodies is a whole ‘nother post. =D I ran out of room and time. lol There are so many incredible options!
I love you. :o)
Looks really yummy! I’ll have to try some, if I find I’m not gluten intolerant. *crossing fingers*
You’ve done it yet again, Stephanie! Yum!
BTW, do you know where in the world we can even BUY Rapadura?
Hello,
We love this recipe!
My sister and I have a very small-scale bakery (called Kneaded Nourishment – we only sell soaked and fresh ground) and were wondering if it’s ok with you if we sell cinnamon rolls from this recipe?
Thanks!
P.S. I realize this is an old post, so maybe I’ll also comment on a new post.
Feel free! =) I’m so glad you like it. Hope your customers enjoy them too.
Does dry buttermilk have live cultures in it?
It depends on the brand and how it was cultured in the first place and if it was dried at a heat that destroyed the live cultures if they were there in the first place. I would suggest contacting the company you buy it from to check and see. =)
I really loved the rolls. I thought it might make a good loaf of cinnamon raisin bread too. So I used the recipe to make into a loaf of bread. I went ahead and made it all with freshly ground wheat berries, and soaked overnight in buttermilk. Next day, I kneaded in raisins, cinnamon and nutmeg. Let that rise until doubled. Then shaped it into the loaf pan. Let that rise until I got the size I wanted. Then I baked at 350 for about 45 minutes. Perfection. Thanks for the recipe!
Wanting to try this without white flour. Do you know of a good substitute? Thanks!
I’ve made it using the Hard White Winter Wheat ground on pastry flour setting (ultra fine) and carefully sifted in the place of the plain unbleached white flour and it’s turned out fine. 🙂 The important thing to protect the optimal texture is to use a white kernel wheat vs. red. The red does not grind into as soft of flour as the white does.